Configure 922 S5 Proxy in Nestbrowser anti-detection fingerprint browser
The process of configuring 922 S5 Proxy in the Nest anti-detection browser is really simple.
![]()
Step 1
Register an account on the 922 S5 Proxy official website, then download and install the 922 client.
Official website: https://www.922proxy.com/
Step 2
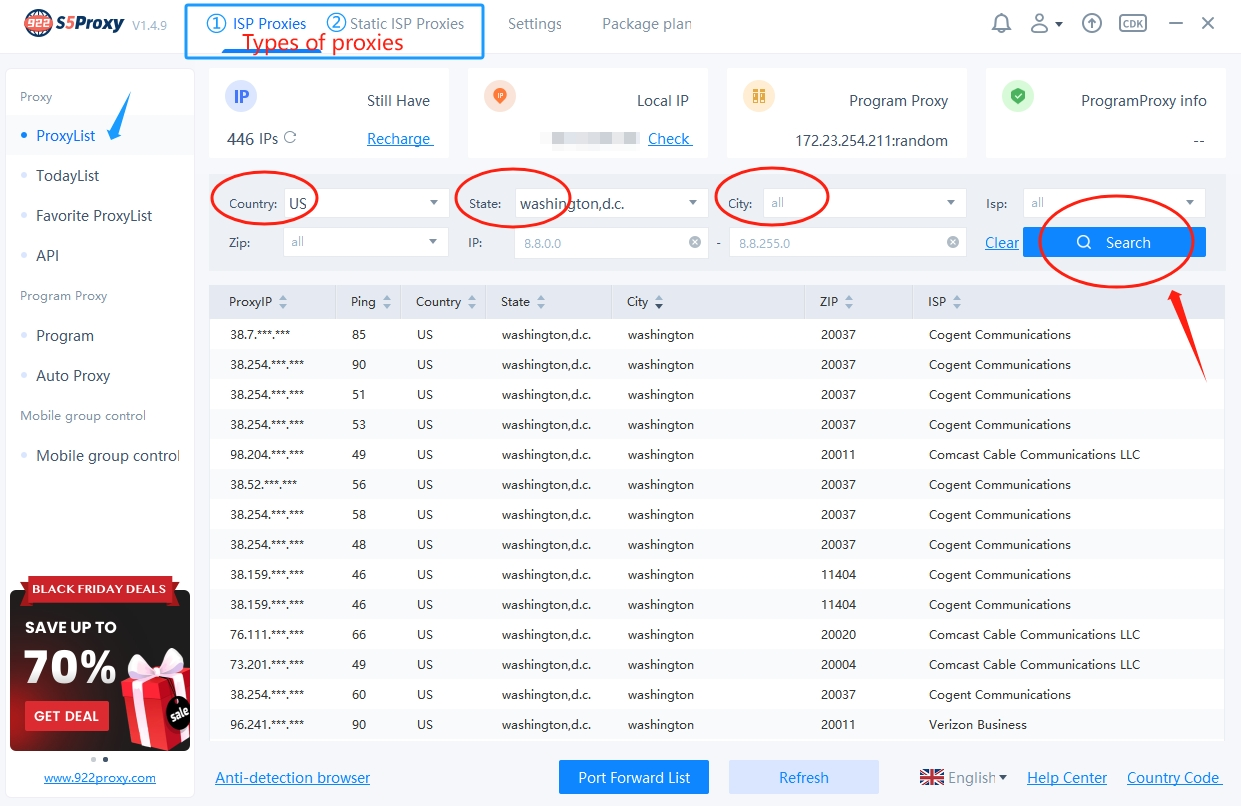
① Filter the country, state, city and other conditions on the ProxyList interface, and then click Search to search for proxy.
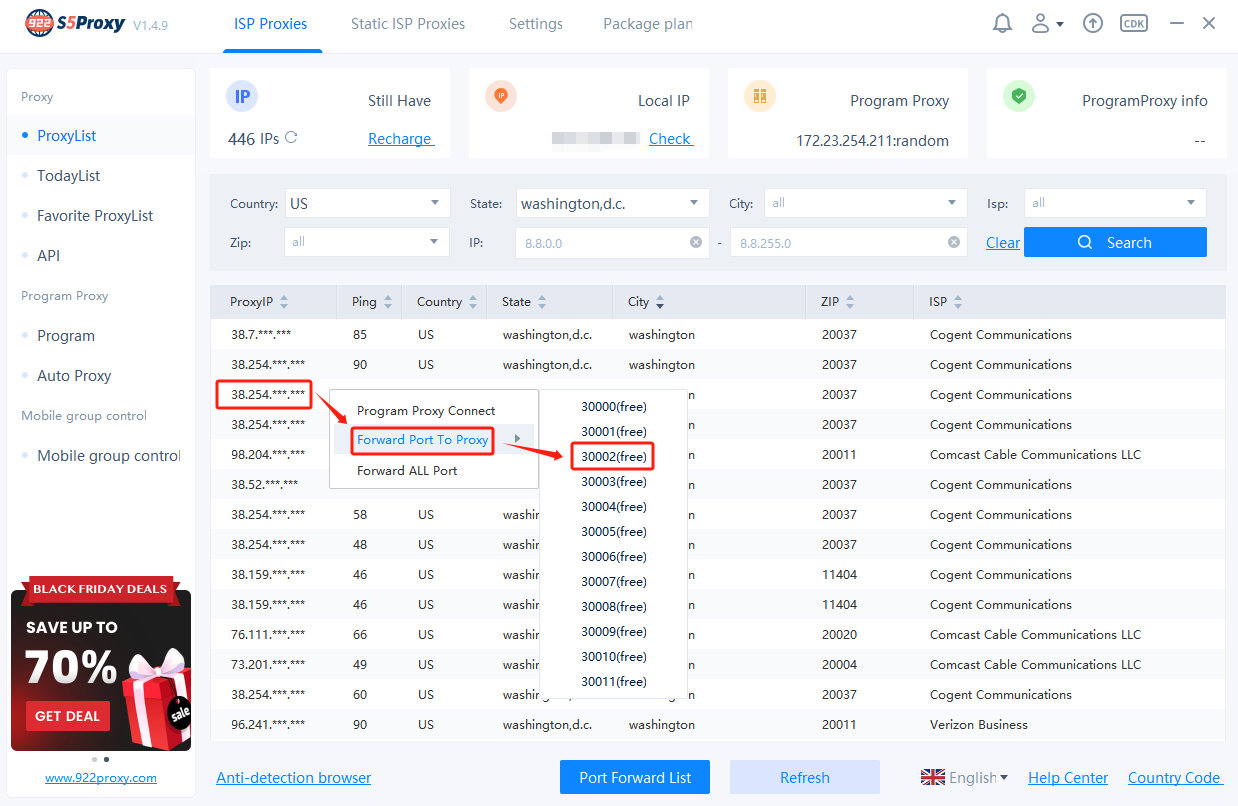
②Right-click the proxy you want, then click [Forward Port To Proxy], and finally click a port.
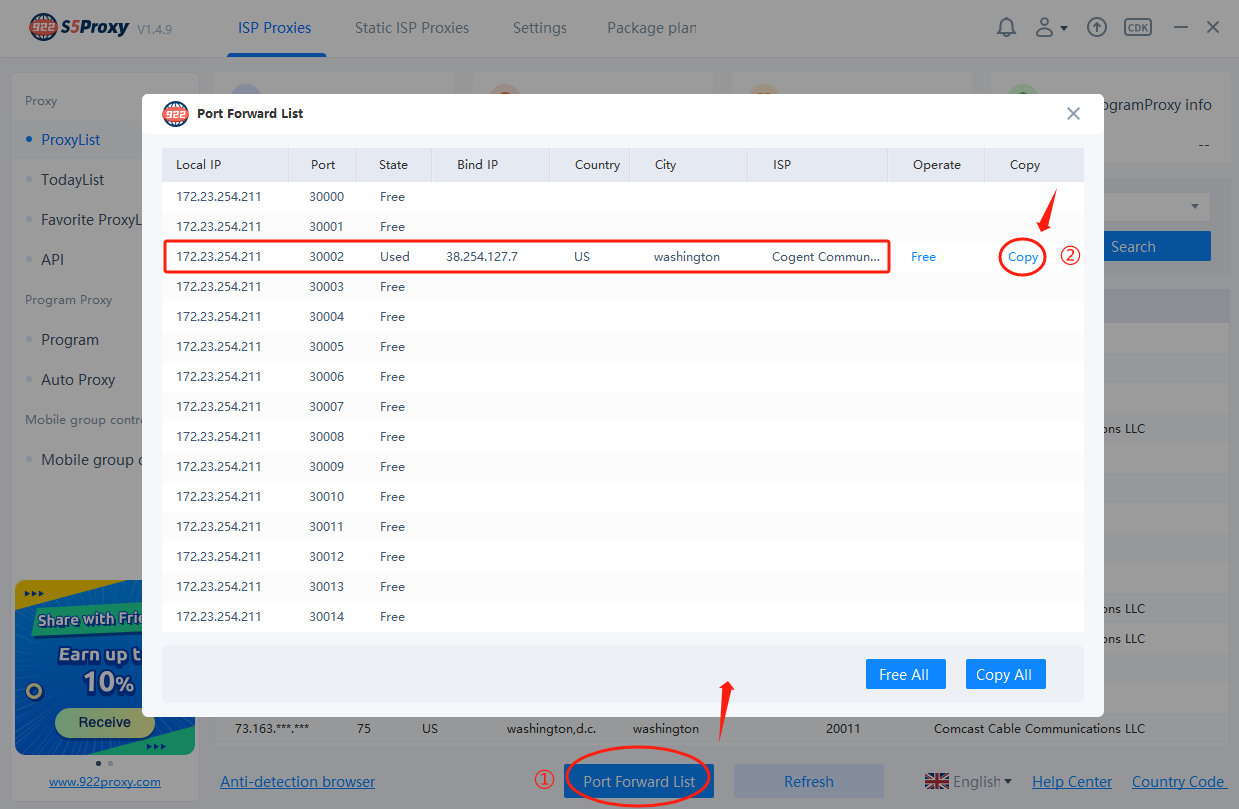
③Open the port forwarding list, you can see the proxy we just extracted, click [Copy] to copy the proxy information.
Step 3
Open the Nest anti-detection browser client, click [Create New Browser], then select the proxy type of [Socks5], paste the proxy information copied in the previous step here, and finally click [Chec]k to check whether the proxy is available.
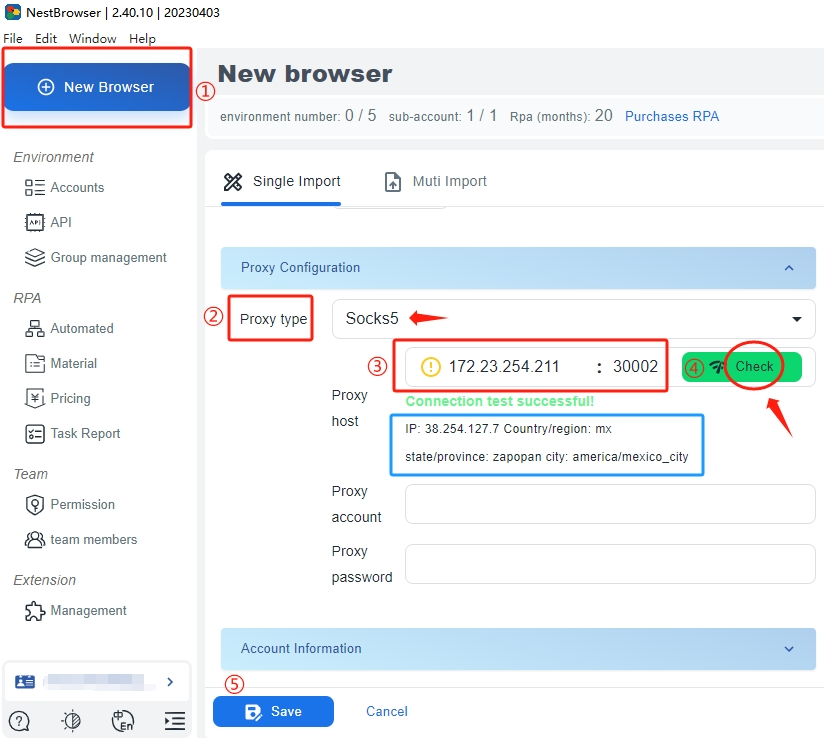 As shown in the figure, the proxy detection is successful and the IP details are displayed. Finally, click [Save] to save the browser configuration, and you can use it normally when you open the browser again.
Another usage method: account and password authentication. The characteristic of this method is that users can use it on the official website without downloading the client.
Step 1
Log in to your account on the 922 S5 Proxy official website, and then click to enter the account and password authentication page.
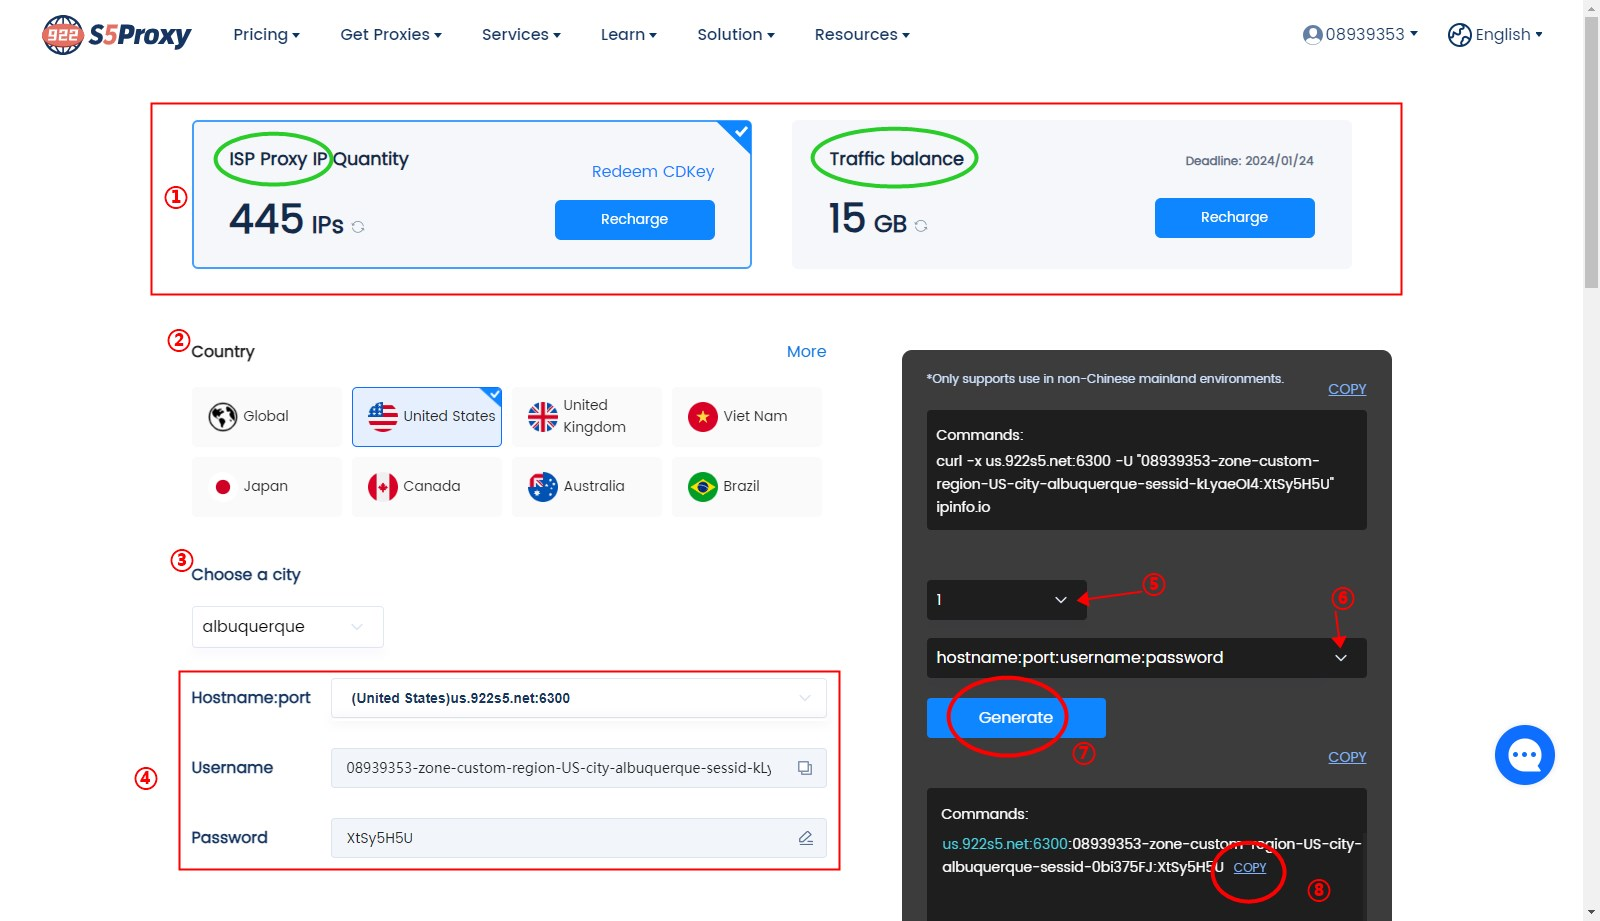 ①First select the ISP package type.
②Select a country.
③Select a city.
④Host name and port as well as your user name and password information.
The user name is generated by default and does not support modification, but the password can be modified.
⑤Select the number of commands to be generated.
⑥Select the format of username and password.
⑦Click to generate.
⑧Click [Copy].
①First select the ISP package type.
②Select a country.
③Select a city.
④Host name and port as well as your user name and password information.
The user name is generated by default and does not support modification, but the password can be modified.
⑤Select the number of commands to be generated.
⑥Select the format of username and password.
⑦Click to generate.
⑧Click [Copy].
Step 2
Open the Nest anti-detection browser client, click to create [New Browser], then select the proxy type of [Socks5], paste the command copied in the previous step here, and finally click [Check] to check whether the proxy is available.
Please note: When pasted in the green box of ③, Proxy account and Proxy password will be filled in automatically.
 As shown in the figure, the proxy detection is successful and the IP details are displayed. Finally, click [Save] to save the browser configuration, and you can use it normally when you open the browser again.
If you want to know more about function usage and promotion information, please click on the official website:https://www.922proxy.com/